

So I splurged on the covers {ha} and spent the time on the embellishing part. And honestly, it took me an hour to do all five? {There's a duplicate not pictured, since it's going up in the guest bedroom...}
To make your own, you need a computer, Word {ick, but sometimes that's all you've got} or a graphics program, some fabric paint, a couple of foam brushes, scissors {an exacto knife works much better} and freezer paper.

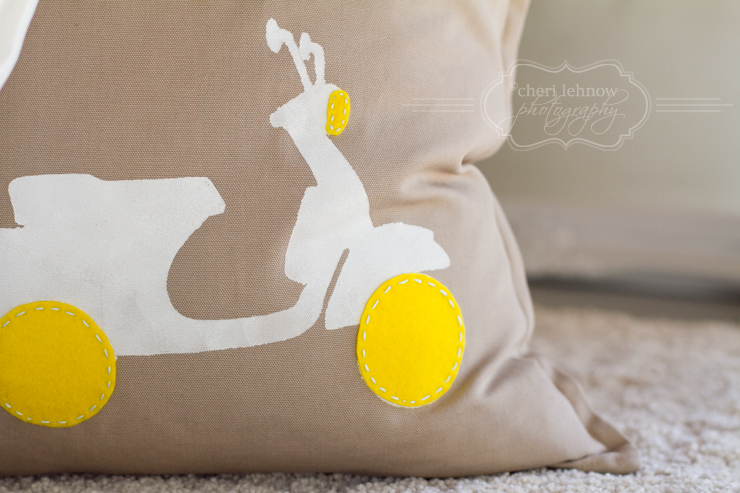 I pulled a scooter graphic from the web, enlarged it to letter paper, printed it and traced it onto my freezer paper. {I added the felt wheels and headlight just for fun, but it's not necessary.} The image you choose doesn't have to be great quality since you're just tracing over it and you can adjust the edges to be smooth when you cut them. The + and the & are GillSans BOLD font enlarged to letter size, printed and traced onto freezer paper. If you've never done freezer paper stencils then you don't know what you're missing. The yellow color block pillow was just made using masking tape.
I mixed my own color for the blue, but the yellow is straight out of the bottle. Once you have your freezer paper stencils ironed to your pillows, put a piece of cardboard in the middle to avoid bleeding onto the back and start applying your paint making sure to press straight down onto the pillow to avoid bleeding under the stencil. It's not likely but it can happen and you'll be sad when you remove the stencil and you have a blob outside the line...
That's it, it's easy! The hardest part is picking what you want for your designs. Enjoy the process!


