
well, if there are any of you planning to come by tomorrow night, i've compiled a list of projects to choose from:
make your own placement clutch. supplies:
placemats
magnetic snaps
embellishments for the front
i will supply the sewing machine
make ribbon paperclips. supplies:
coordinating ribbon
hot glue gun
paperclips
scissors
make a flower bib necklace. supplies:
pre-made flowers or supplies to make some
felt
embellishments {fancy buttons or brads}
chain
chain clasp hardware
hot glue gun
to-go cup cozies. supplies:
felt
embellishments if you choose
i will provide the sewing machine and the template
pacifier clips. supplies:
ribbon
velcro
embellishments
mitten or suspender clips
i will provide the sewing machine
photo tile coasters or canvas art. supplies:
white square tiles {home depot or lowes} or 8x10 canvas
adhesive backed cork roll {don't need if making the canvas}
pre-printed 4.75x4.75 square images or pre-printed 8x10 image
mod podge
sponge brush
button art. supplies:
buttons
embroidery floss
i will provide the needles
muslin or linen fabric piece
There. Now if anyone has other projects they want to try, just let me know here or on facebook and i'll write out the supply list for you. We should have a grand time making little happy Christmas gifts, so come one come all!
Wednesday, November 30, 2011
Tuesday, November 29, 2011
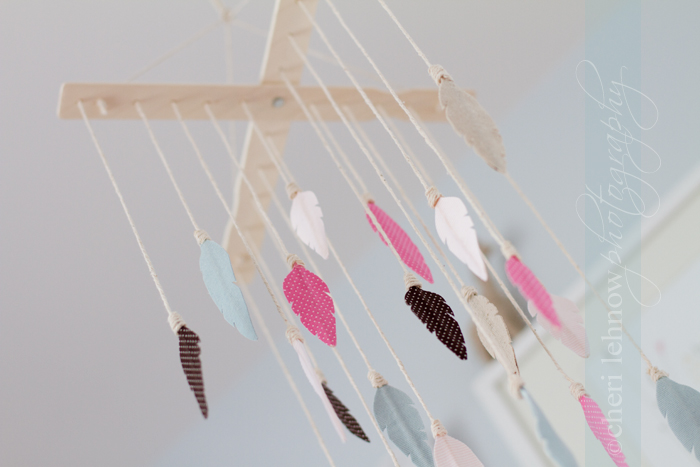
birds of a feather
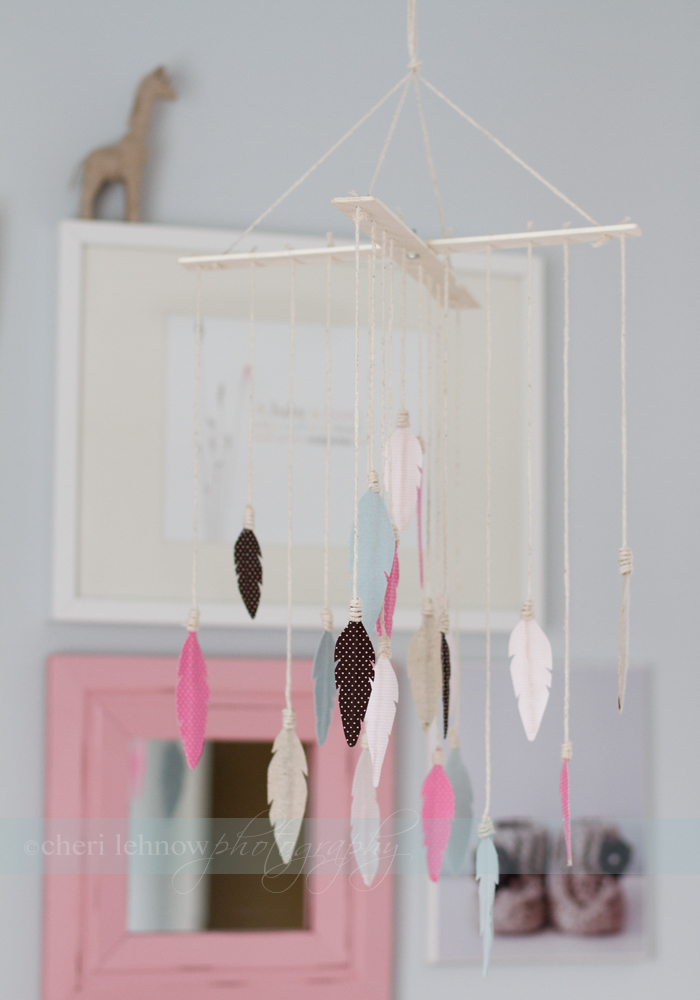
So I've made a mobile for the bebe's room, but I'm not sure if I love it. What do you think? I found the tutorial for making the fabric feathers here and although I love the feathers, I'm still undecided on the finished project. I don't know if it's too busy, or if I just need to look at it in the room for a few days...
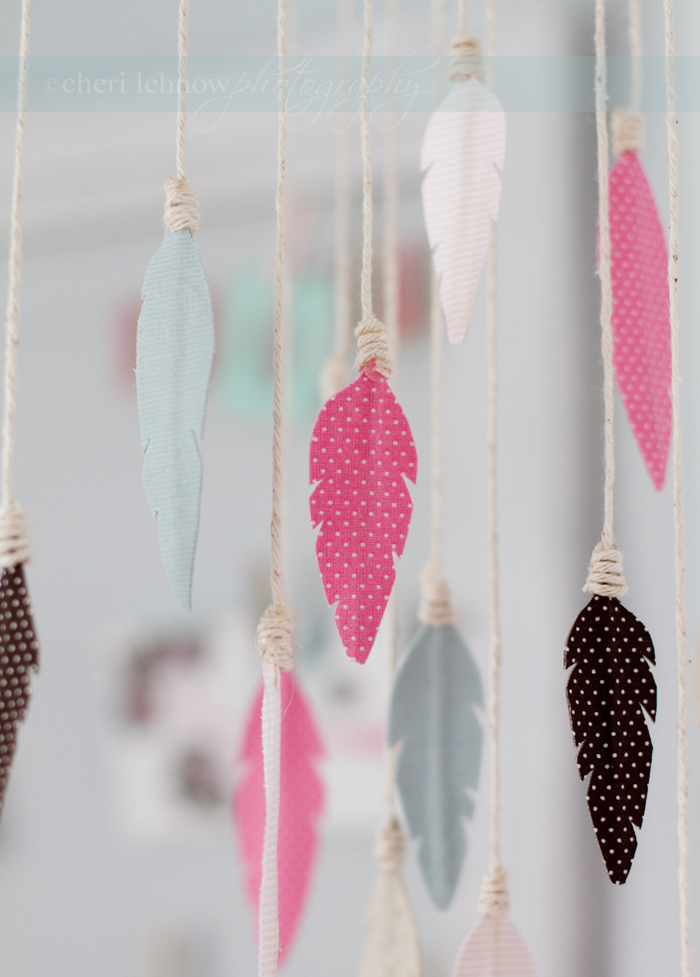
It was really simple to make actually, I just used two paint stirrers, spaced and drilled some holes and then pulled the twine through and tied a knot. It's cute, don't get me wrong, I just can't make up my mind. Maybe it's the bebe brain?
Monday, November 28, 2011
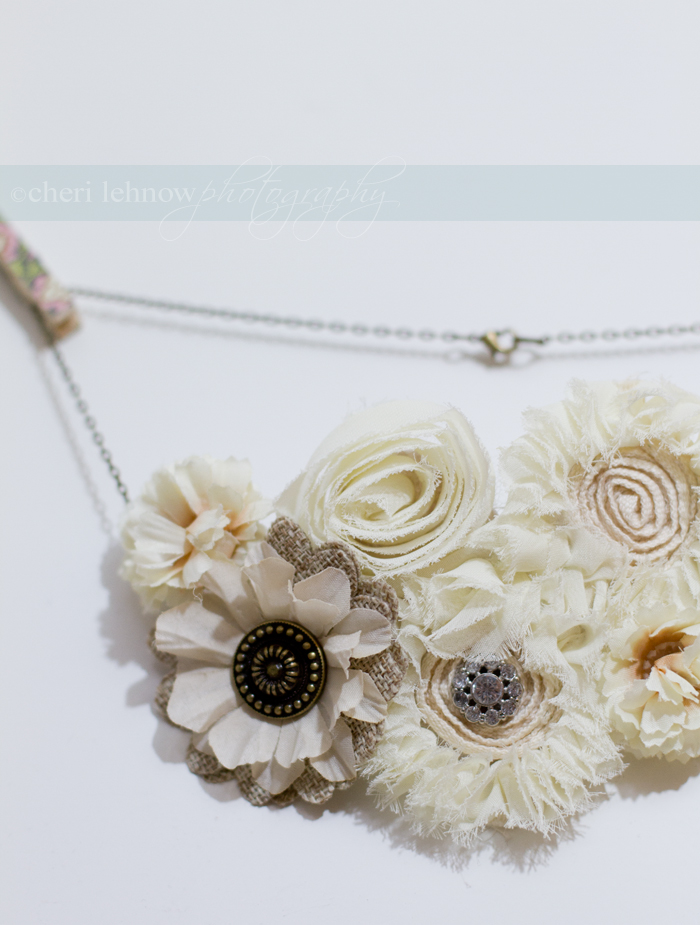
and something for me...
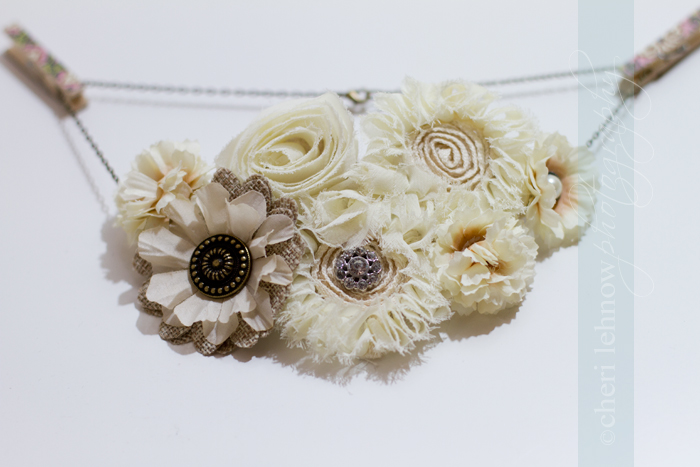
I finally broke down and made myself one of those ever-popular bib necklaces. Really simple actually, just some hot glue, felt, chain and pre-made flowers. I found the fabric and the burlap flowers on clearance for a couple of dollars and the filler flowers are fake flowers. I simply glued the flowers in an arrangement onto the felt, glued {and stitched, for extra holding power} the chains to each side of my felt and then cut the felt out so none of it showed through in the final product. Simple!
Saturday, November 26, 2011
handcrafted Christmas: ribbon paperclip bookmarks

These again were inspired by a similar idea on Pinterest and a really long wait in the fabric cutting line yesterday morning. All you need is some coordinating ribbon, paperclips {mine are small but you could use a larger version as well} and some hot glue.
This first version is just looped through the paperclip at the top, pulled tight and cut.
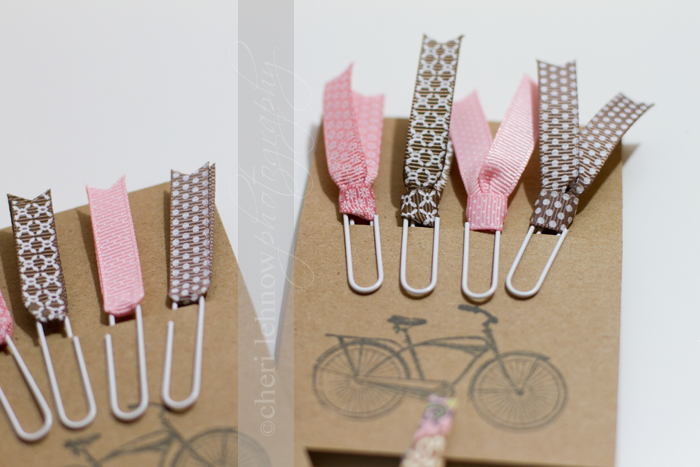
This second version is just looped through and hot glued in place, then cut.
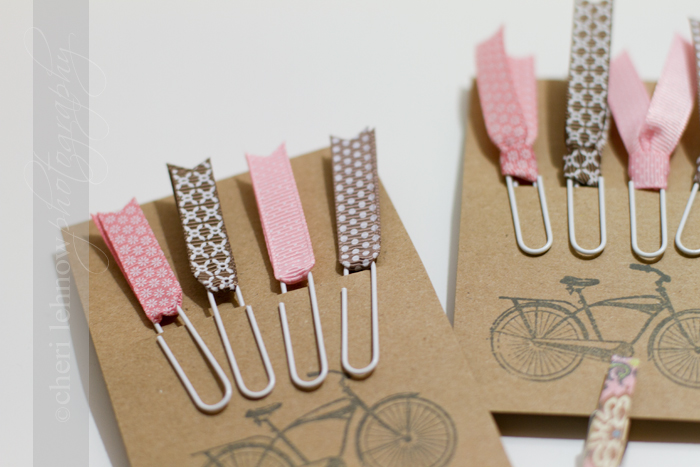
So simple {and quick} to make and perfect for stocking stuffers...
Friday, November 25, 2011
yup, it was Pinterest, again
Thanks to that site I just happen to love so much I want to marry, I created something out of a piece of furniture that was headed for the dump.
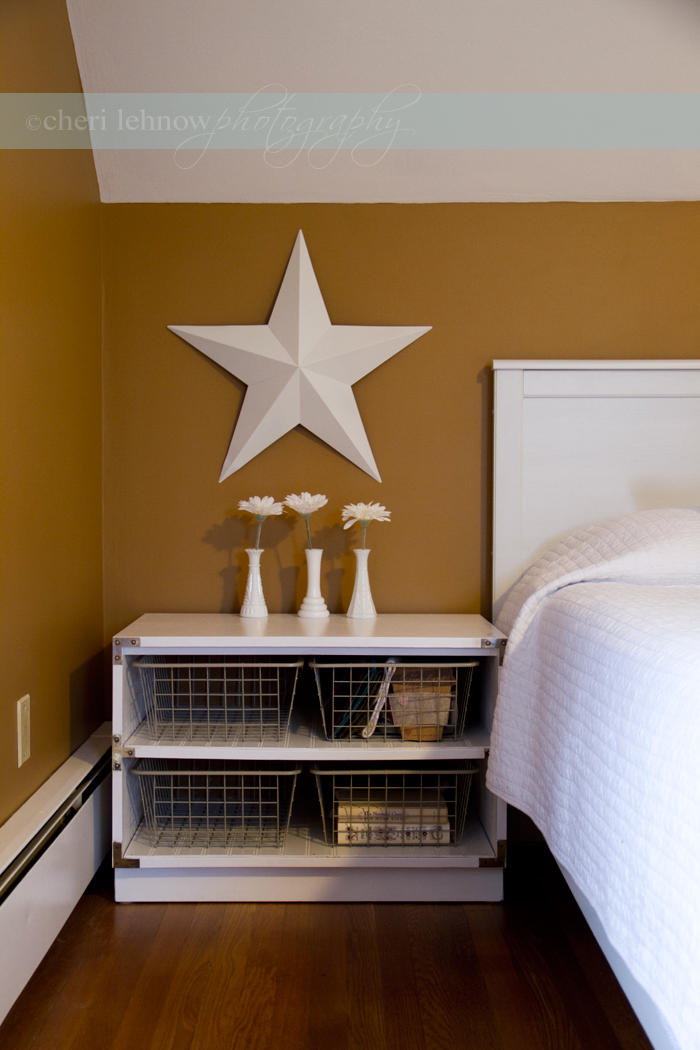
I bought this a LONG time ago for $5 and it sat and sat and sat in my basement, while other projects took presidence. Well, after a year of climate changes, moisture and movement, the drawers didn't fit so well anymore and I just couldn't deal with it, so it sadly gathered dust. It was on it's way out until a friend pinned an idea, baskets instead of drawers in an old dresser! Egads! So after a new coat of white paint {2 actually} and some wainscot panelling cut to size, it has a new life as a guest room side table. Luckily I had the Ikea baskets laying around from an old wardrobe AND they happened to fit PERfectly. And who couldn't use more storage, especially since that room's going to be filling up soon...
I bought this a LONG time ago for $5 and it sat and sat and sat in my basement, while other projects took presidence. Well, after a year of climate changes, moisture and movement, the drawers didn't fit so well anymore and I just couldn't deal with it, so it sadly gathered dust. It was on it's way out until a friend pinned an idea, baskets instead of drawers in an old dresser! Egads! So after a new coat of white paint {2 actually} and some wainscot panelling cut to size, it has a new life as a guest room side table. Luckily I had the Ikea baskets laying around from an old wardrobe AND they happened to fit PERfectly. And who couldn't use more storage, especially since that room's going to be filling up soon...
Thursday, November 24, 2011
thanks mom
This Thanksgiving, I have a lot to be thankful for, my life is full and blessed. As is my belly! Regardless, there's one thing i've always appreciated: my creative gene. Thanks to my crafty/artistic mom, I've always had an outlet for my imagination, and she always encouraged me to create.
Well this one I can't take credit for, but thanks to Pinterest and all those other imaginative people out in the world, I came across an inspiring idea. So I took my butt down to the thrift store, bought a sweater for $6.00, cut off the sleeves and stitched a hem. Easiest. thing. ever. And, I love them. And, they keep my legs warm. My dearest Pinterest, I love you, please don't ever die...
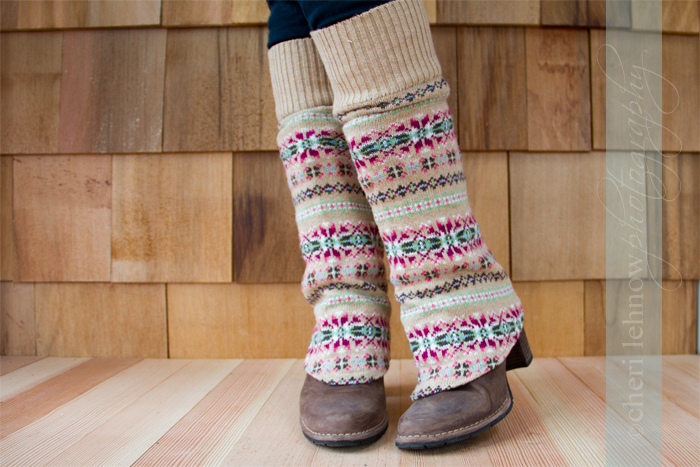
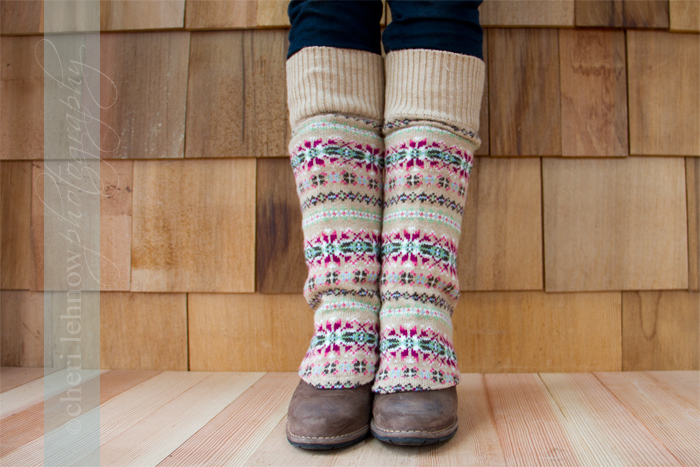
So Happy Thanksgiving to all you creative and not-sure-if-you're-creative people out there. You never know until you try!
Well this one I can't take credit for, but thanks to Pinterest and all those other imaginative people out in the world, I came across an inspiring idea. So I took my butt down to the thrift store, bought a sweater for $6.00, cut off the sleeves and stitched a hem. Easiest. thing. ever. And, I love them. And, they keep my legs warm. My dearest Pinterest, I love you, please don't ever die...
So Happy Thanksgiving to all you creative and not-sure-if-you're-creative people out there. You never know until you try!
Wednesday, November 23, 2011
handcrafted Christmas: placemat clutch
And who doesn't want to know how to make this?:
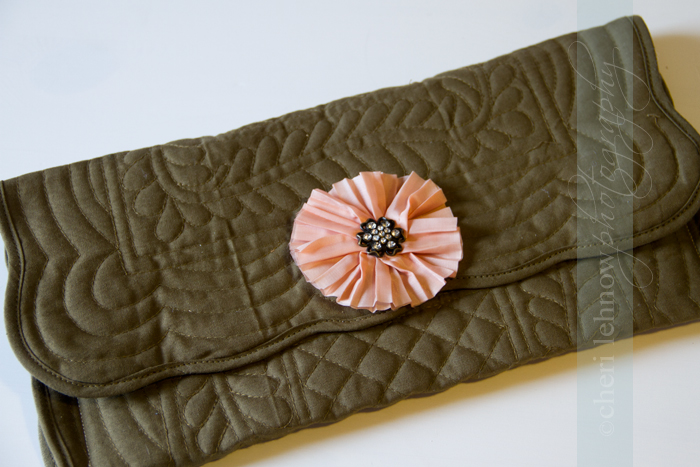
Yeah, I know you do. Have ten minutes? Cause that's about how long it will take you to make one of these bad boys. First you'll need:

a placemat
magnetic snap set
scissors
hot glue gun
felt
embellishment, or vintage pin
First you want to fold over one side of your placement, to create an envelope and sew the sides shut:
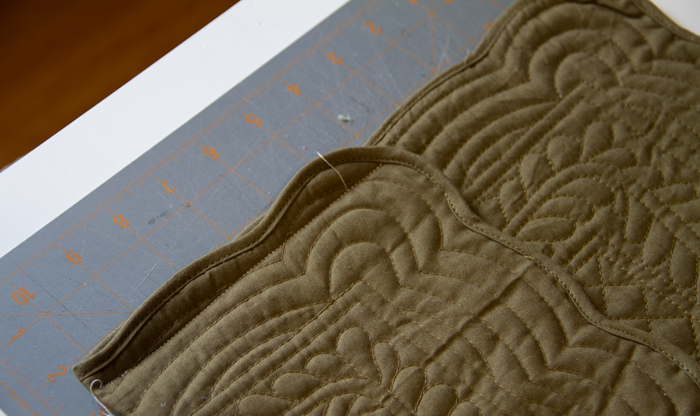
Next you want to place your magnetic snaps, like so, and cut a circle of felt large enough to cover the snap. Hot glue felt to inside back of bottom snap, to keep things from getting caught on there...
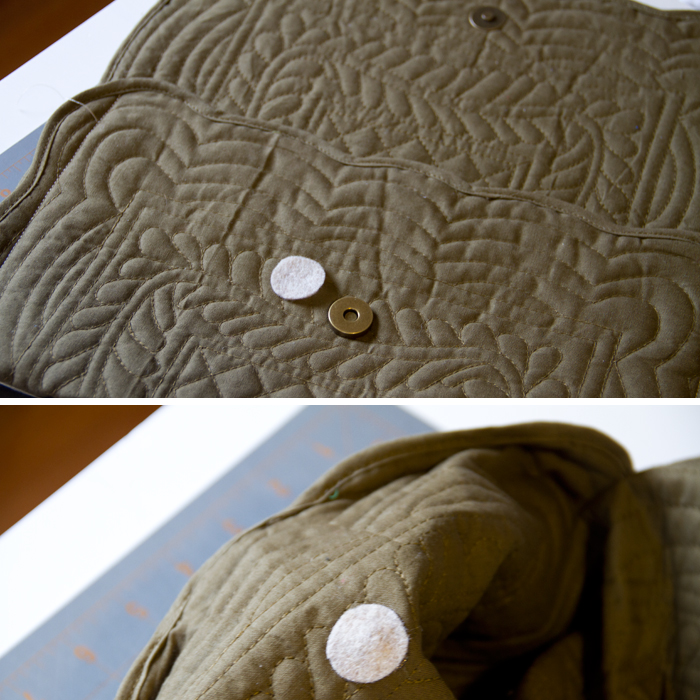
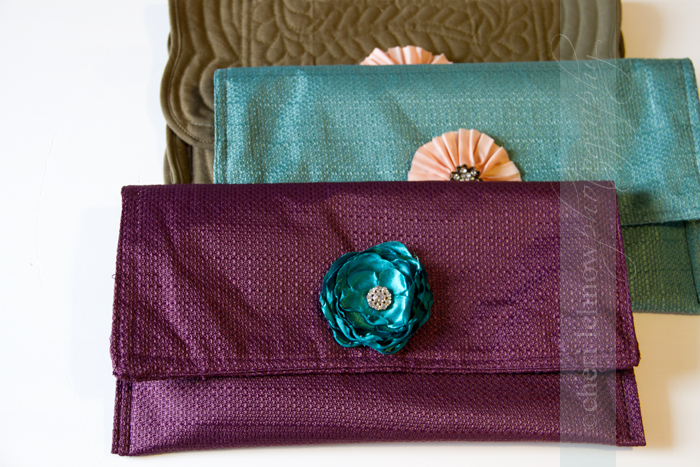
Now just hot glue your decorative embellishment over the top snap {or another piece of felt and then add your pin} and you're done! They were so quick that I had to make a few, and one of those just might be for me for keeps...mm hm. Any questions, let me know!
Yeah, I know you do. Have ten minutes? Cause that's about how long it will take you to make one of these bad boys. First you'll need:
a placemat
magnetic snap set
scissors
hot glue gun
felt
embellishment, or vintage pin
First you want to fold over one side of your placement, to create an envelope and sew the sides shut:
Next you want to place your magnetic snaps, like so, and cut a circle of felt large enough to cover the snap. Hot glue felt to inside back of bottom snap, to keep things from getting caught on there...
Now just hot glue your decorative embellishment over the top snap {or another piece of felt and then add your pin} and you're done! They were so quick that I had to make a few, and one of those just might be for me for keeps...mm hm. Any questions, let me know!
Monday, November 21, 2011
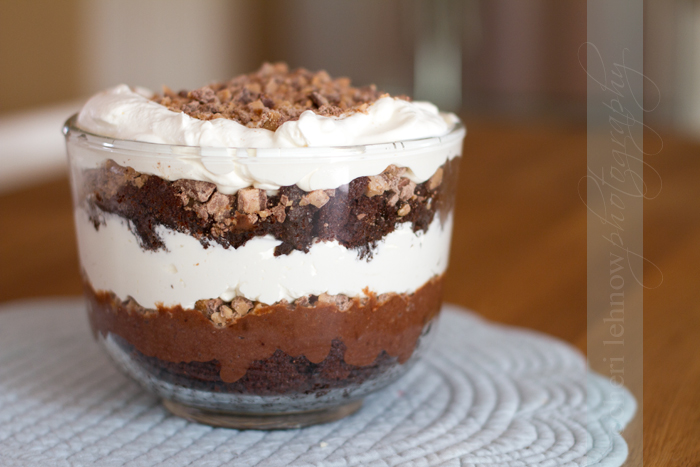
go to dessert: death by chocolate
So this is my go-to dessert and by far my husband's favorite. It's super easy to make and absolutely delicious, and it just looks impressive.
What you need:
1 box chocolate cake mix
1 box chocolate pudding mix
heath bars
whipped cream
Ok, so you bake the cake according to the directions. Once it's done and cooled slightly, you can just break it up with a spoon in the pan. You can also pour a little coffee liquor over the cake and let it sit before layering it into your dessert, but i've been skipping that step lately ;)
While your cake is baking, feel free to make the pudding and let set in the fridge. I usually make my own whipped cream at this point too and then set it in the fridge. Also take the time to break up your heath bar into small pieces.
Now, starting with the cake, just start layering until you run out of the goods. It's that simple. Always leave off with a top layer of whipped cream, and top it with some crushed heath bar. Mmm mm.
Friday, November 18, 2011
handcrafted Christmas: fabric covered tins
As you will see, I made a quick tutorial, but the original idea comes from here. She used fabric glue, which would probably work better, but I was too lazy to look the original instructions up, so I went with mod podge. Because who doesn't love a little mod podge?
Anyway, All you need is some mod podge, scissors, fabric scraps, old mint tins and a brush.

Place a layer of mod podge on the top of your tin and adhere your fabric scrap. Even everything out. Repeat this step with the bottom.
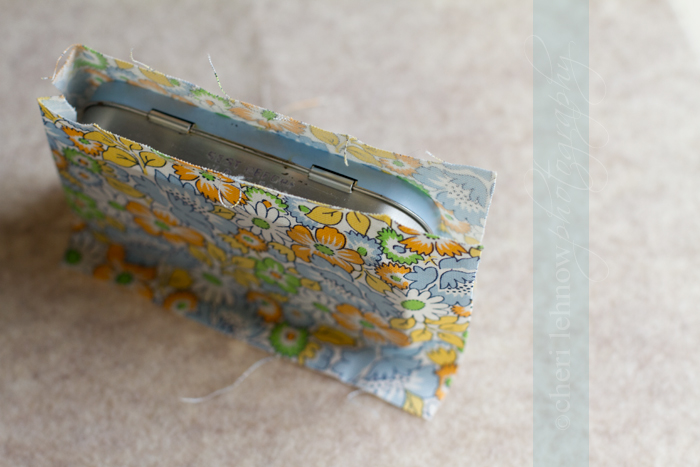
Trim the excess once everything is dry. I also added a bit of mod podge to the edges to help with fraying. It seems to work, and if you get any on the metal part you can just scrape it off with your nail when it's dry.

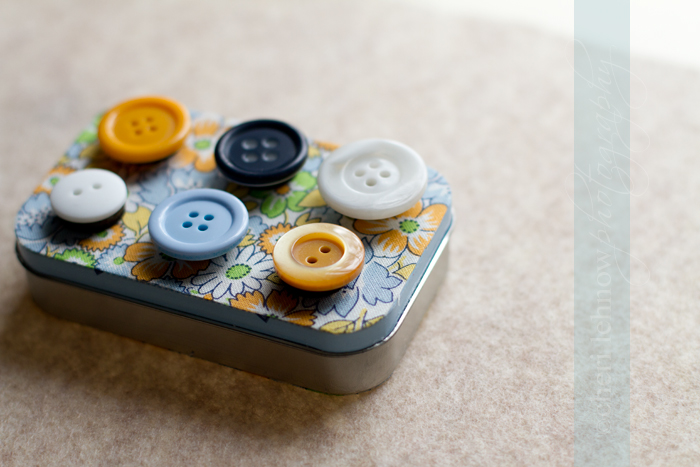
I made several and have different plans for each.
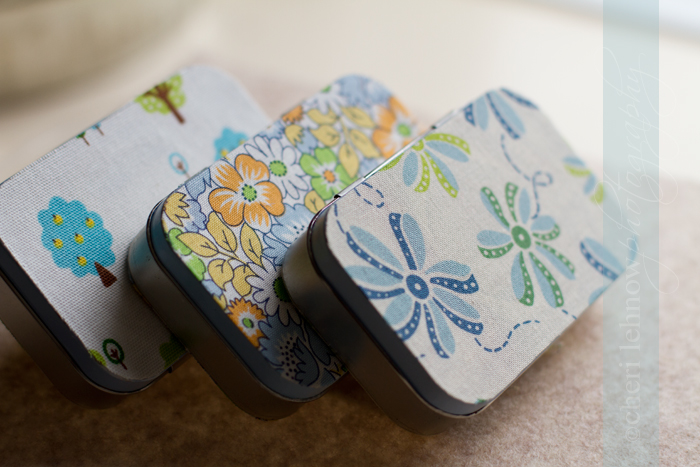
Here's one though, coordinating button magnet sets. You could also use them to gift some tags, or as business card holders. Perhaps gift card holders or jewelry tins. They'll be great to have around for wrapping on a whim.
Anyway, All you need is some mod podge, scissors, fabric scraps, old mint tins and a brush.
Place a layer of mod podge on the top of your tin and adhere your fabric scrap. Even everything out. Repeat this step with the bottom.
Trim the excess once everything is dry. I also added a bit of mod podge to the edges to help with fraying. It seems to work, and if you get any on the metal part you can just scrape it off with your nail when it's dry.
I made several and have different plans for each.
Here's one though, coordinating button magnet sets. You could also use them to gift some tags, or as business card holders. Perhaps gift card holders or jewelry tins. They'll be great to have around for wrapping on a whim.
Thursday, November 17, 2011
burp cloths for the bebe
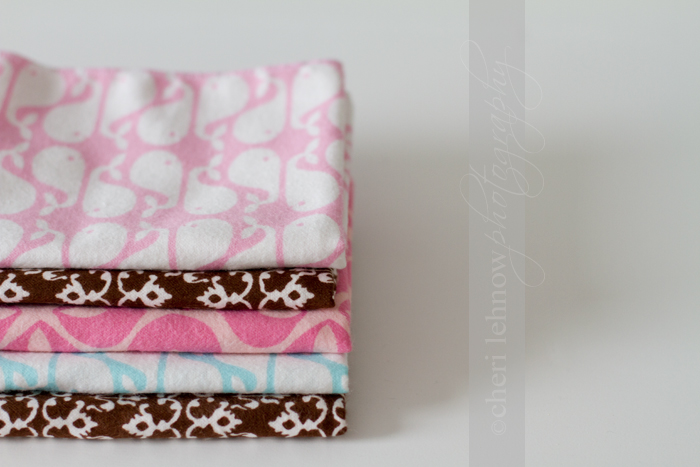
Ok, I knew it couldn't be that hard. And I knew I wasn't paying that much for something my bebe was just going to be spitting up all over SO I figured it out! All it takes is some flannel {$3 a yard on sale!} and a serging stitch. Simple, easy, no mess. I could handle this.
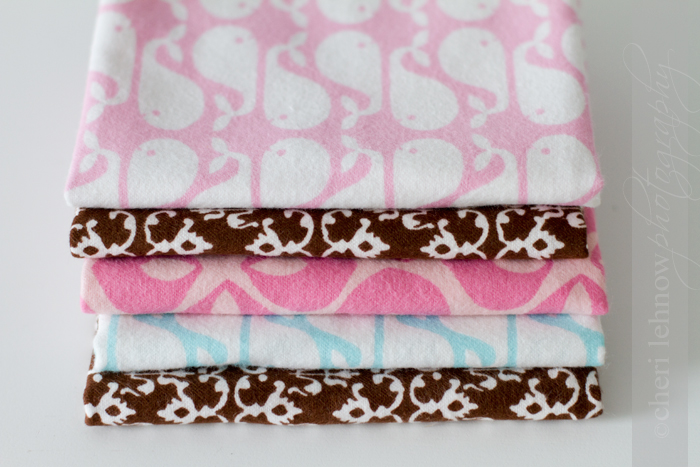
Luckily I was able to find some really cute patterns, those whales make me happy.
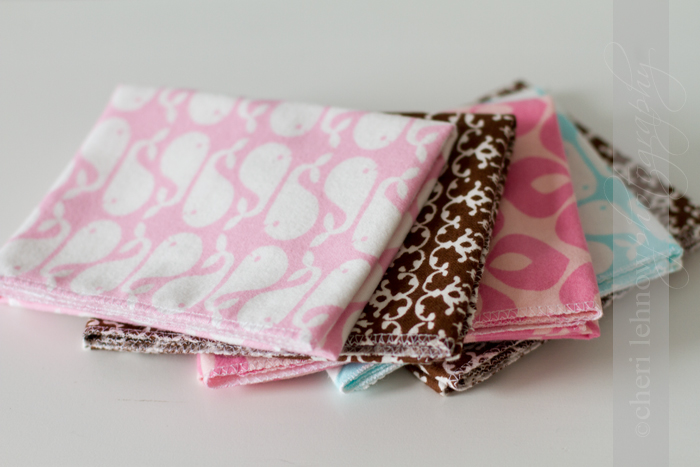
And I was able to figure out that my fancy machine has a serging foot and stitch. Wahoo!
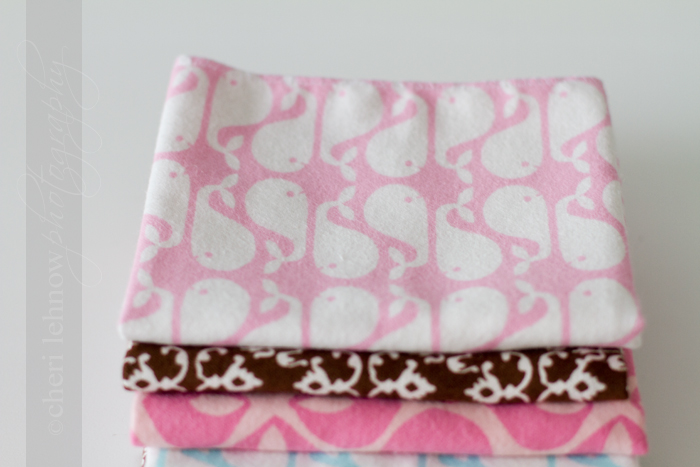
The final cost for this project: .75¢ Yup. A whopping 75 cents a piece. Insane really. Each cloth is a quarter yard. Don't those whales make you happy too?
Wednesday, November 16, 2011
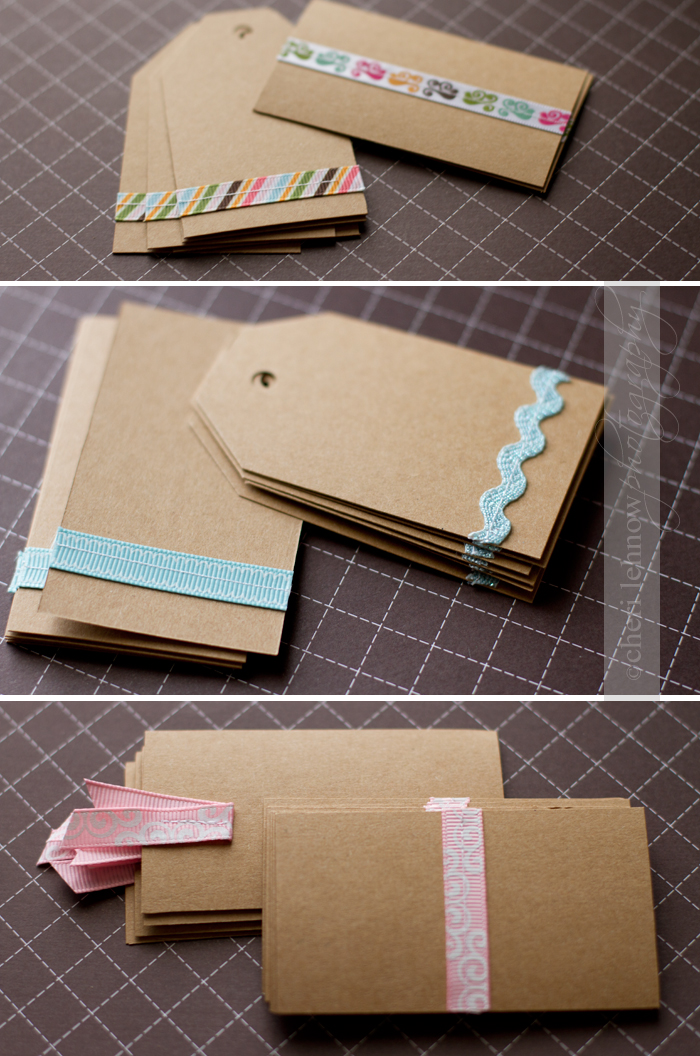
handcrafted Christmas: craft ribbon tags
Winner winner chicken dinner! Well, not really, just a cozy for your starbucks! The winner is....wait for it.....bumbleBEE! thanks for playing everyone and keep reading, because i'll be having a few more giveaways in the spirit of gift-giving!
Back to crafting, I'm currently in the gifting mindset, and this year Christmas will be mostly handmade. I'm trying to keep it simple, so craft paper is going to be my wrapping go-to. I wanted to make some fun tags at least, to pair with colorful ribbon so my packages still have some pop. If you've never sewn ribbon onto paper, I highly recommend it. It's fun, fast and festive!
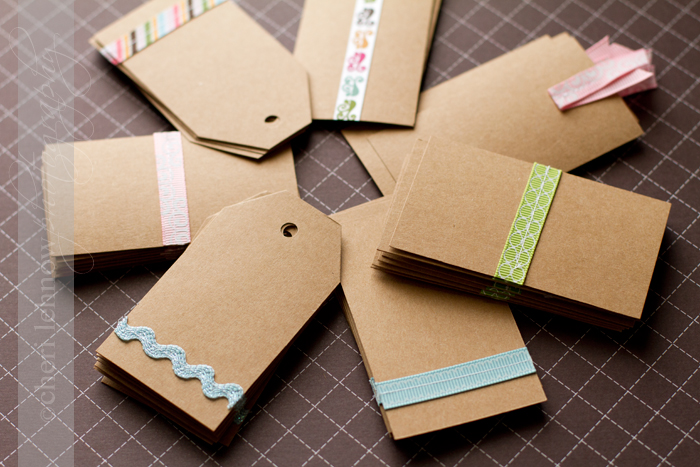
My trick was to keep the tags {craft cardstock cut to around business card size} lined up one after another and then cut them apart after I was finished with that particular ribbon. Really quick and simple. I think I may end up attaching a lot of these to packages with mini clothespins, so I only punched holes in a couple of sets. These could also make really cool stocking stuffers for the stationary fan. Anyway, try it, you won't regret it!
Back to crafting, I'm currently in the gifting mindset, and this year Christmas will be mostly handmade. I'm trying to keep it simple, so craft paper is going to be my wrapping go-to. I wanted to make some fun tags at least, to pair with colorful ribbon so my packages still have some pop. If you've never sewn ribbon onto paper, I highly recommend it. It's fun, fast and festive!
My trick was to keep the tags {craft cardstock cut to around business card size} lined up one after another and then cut them apart after I was finished with that particular ribbon. Really quick and simple. I think I may end up attaching a lot of these to packages with mini clothespins, so I only punched holes in a couple of sets. These could also make really cool stocking stuffers for the stationary fan. Anyway, try it, you won't regret it!
Tuesday, November 15, 2011
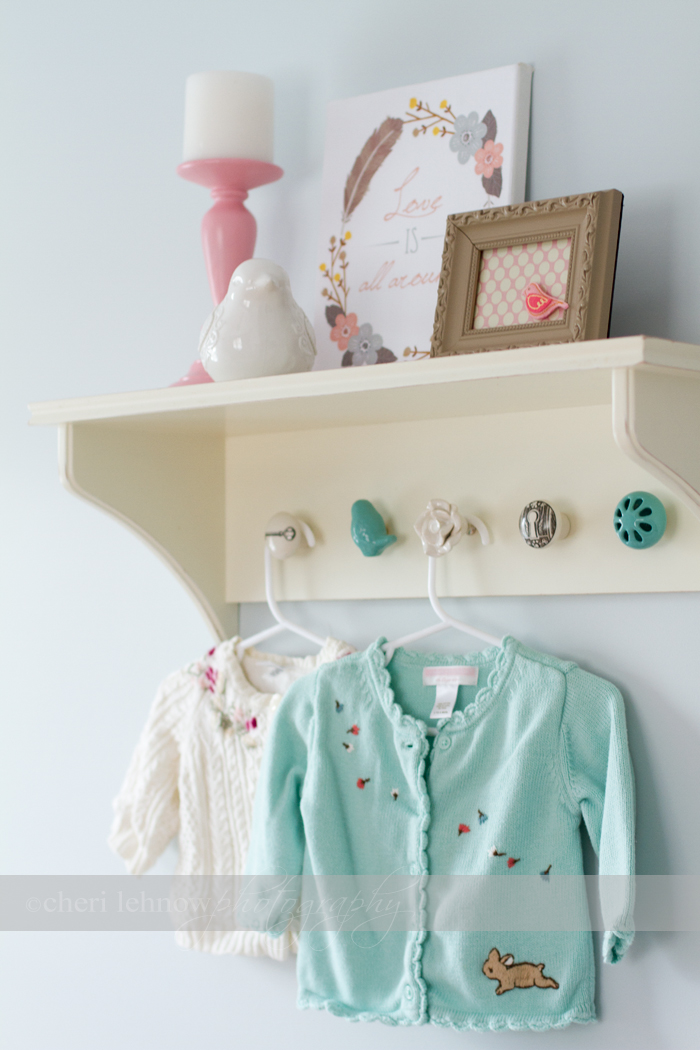
at it again: another thrifty find updated
Well, I'm at it again, this time with a $3 hanging shelf I purchased a while back at the thrift store. I knew it would eventually live in the nursery, but I had no idea it would end up the way it has. I pretty much had no plan going into it, but after finding some adorable inexpensive knobs, I knew what it should be!
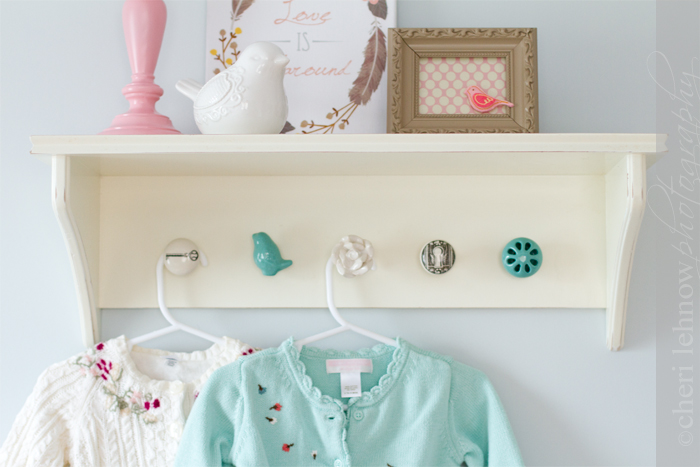
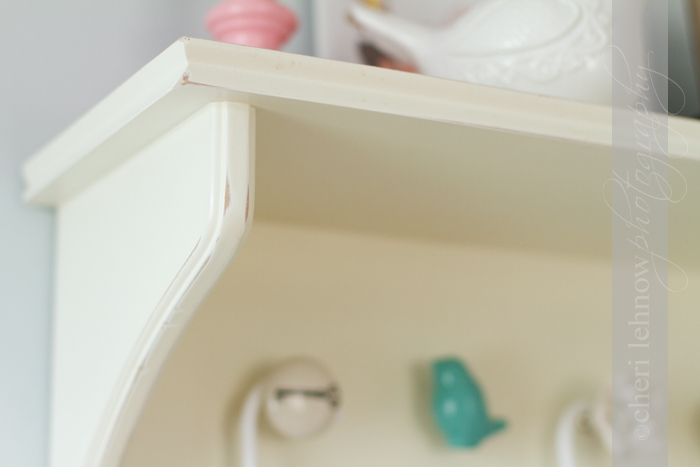
First, it was white {off-white}, and in pretty good shape, so instead of painting it again, I decided to give it a quick distressing with my sandpaper block. If you don't have one of these, it's not necessary but it does make the job easier then working with just the paper.
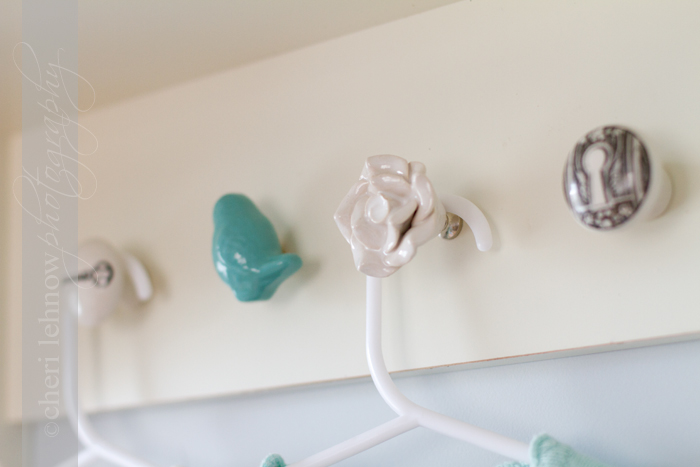
Second, I measured for, marked, and drilled the holes where my new knobs would go. Now here's the tricky part. The knobs are long screws held in with hex nuts, which means, to make them flush, I had to partially drill a larger hole in the back of each of my holes I already drilled. This way the nut fits into the hole, and becomes flush with the back, so there are no hanging issues.
The following step is daunting. I have a Dremel, and a metal cutting blade, but if I didn't, I don't know what I would have done. All that extra screw coming out of the back had to be cut down, again, to make everything flush. All the sparking made me nervous, but as long as you wear gloves and safety goggles, you should be fine. Don't take my word for it though, I kept imagining my basement up in flames!
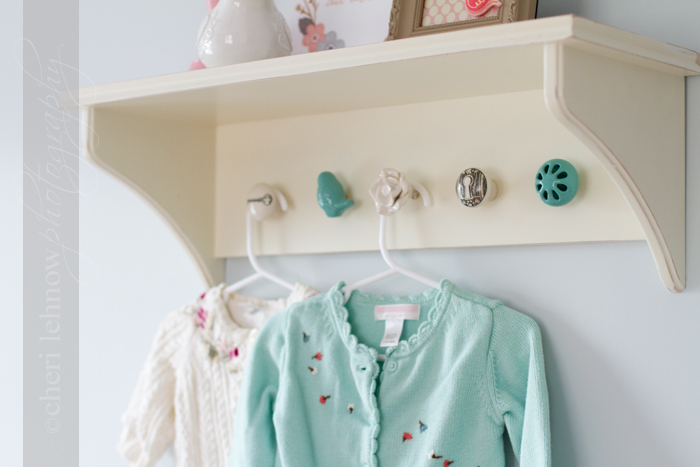
All in all, it was an easy enough project, with the right tools. I wish I had better pictures for you, but unfortunately I didn't think to stop at each step since I was so excited about getting it finished. The whole project ended up costing me $13 dollars, which is not bad, considering it's one of the cutest things in there now!
First, it was white {off-white}, and in pretty good shape, so instead of painting it again, I decided to give it a quick distressing with my sandpaper block. If you don't have one of these, it's not necessary but it does make the job easier then working with just the paper.
Second, I measured for, marked, and drilled the holes where my new knobs would go. Now here's the tricky part. The knobs are long screws held in with hex nuts, which means, to make them flush, I had to partially drill a larger hole in the back of each of my holes I already drilled. This way the nut fits into the hole, and becomes flush with the back, so there are no hanging issues.
The following step is daunting. I have a Dremel, and a metal cutting blade, but if I didn't, I don't know what I would have done. All that extra screw coming out of the back had to be cut down, again, to make everything flush. All the sparking made me nervous, but as long as you wear gloves and safety goggles, you should be fine. Don't take my word for it though, I kept imagining my basement up in flames!
All in all, it was an easy enough project, with the right tools. I wish I had better pictures for you, but unfortunately I didn't think to stop at each step since I was so excited about getting it finished. The whole project ended up costing me $13 dollars, which is not bad, considering it's one of the cutest things in there now!
Monday, November 14, 2011
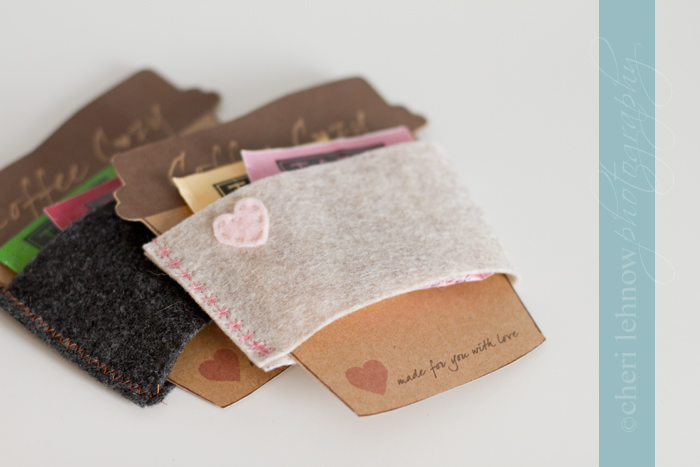
cup cozy packaging
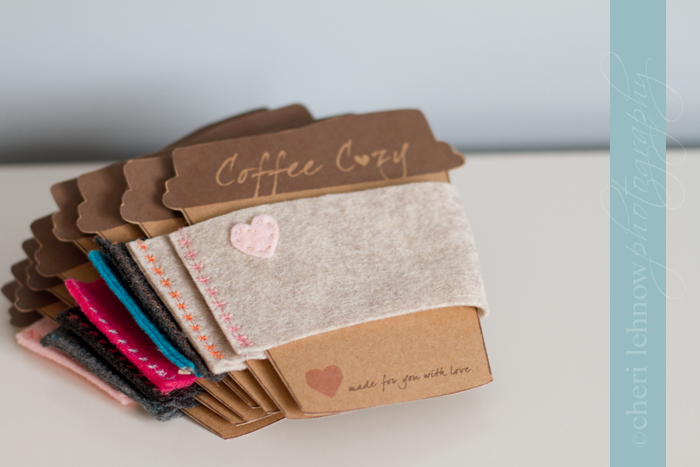
Well, I've been picking my brain over a good way to package these cozies for Christmas, and I think I've done it! I'm making this template available for you all, in case you need a handy way to gift these as well. I went ahead and printed mine on cardstock craft paper, but they look just as lovely on white cardstock. Download the template here.

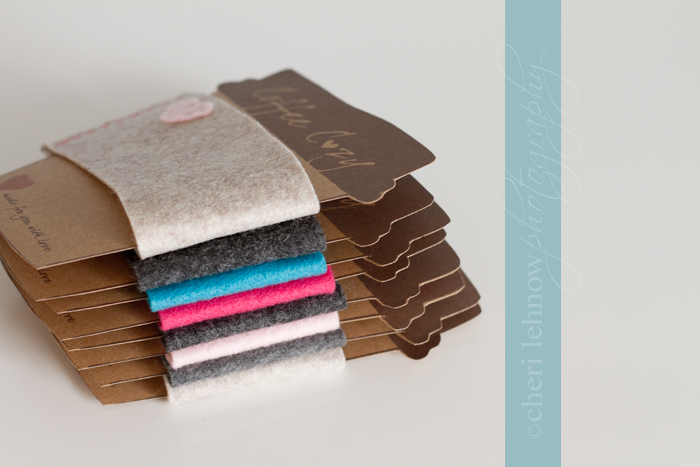
They're a little loose on the 'cups' but this gives you the option of filling them with a couple of tea bags or a packet or two of instant coffee...happy gifting! And don't forget to sign up to win a cozy here. Oh and PLEASE respect the art and only download these for personal use!
Friday, November 11, 2011
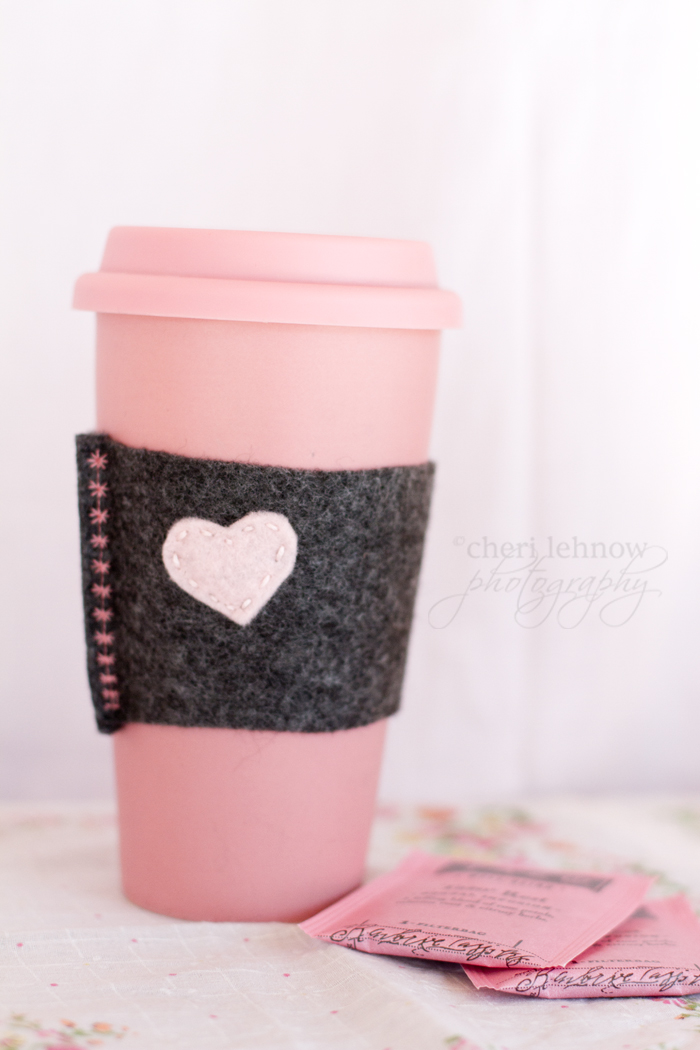
A cozy cup of tea
Okay, okay, I know I only 'pinned' these a mere 11 hours ago, but I was dying to try them. Since the wee bebe will be on her way so close to Christmas, I have to stock-pile gifts early. And my goodness are they addicting. I love the way they came out and I experimented with different stitches, thread colors and felt embellishments. Yay for some cold weather to keep me away from that outdoor painting project...
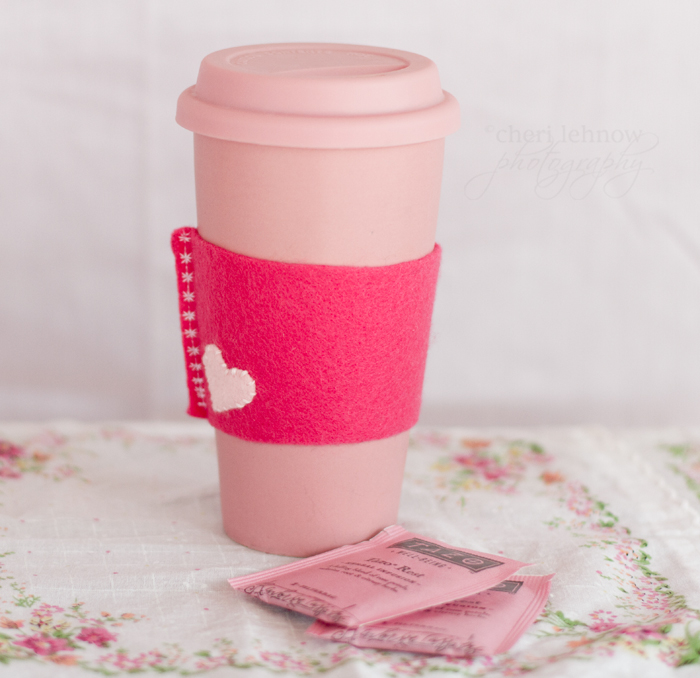
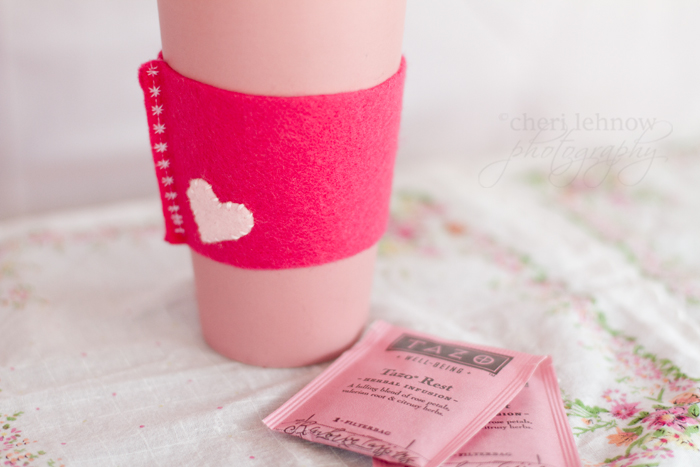
And the best part is I have one for winning! Just leave a comment here with your easiest go-to DIY Christmas gift idea and you'll be entered to win this bunted cozy. I'll even throw in a couple of those yummy pink Tazo teabags. I'll announce a winner next Wednesday, the day I'll officially be 36 weeks, yikes! Good luck!
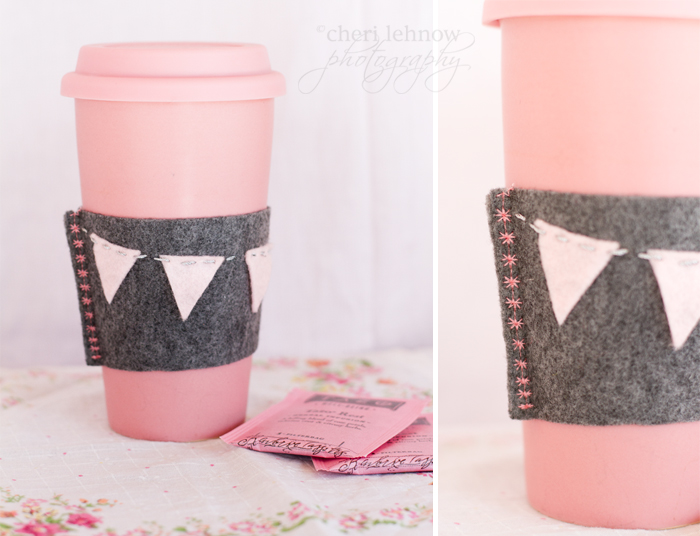
And the best part is I have one for winning! Just leave a comment here with your easiest go-to DIY Christmas gift idea and you'll be entered to win this bunted cozy. I'll even throw in a couple of those yummy pink Tazo teabags. I'll announce a winner next Wednesday, the day I'll officially be 36 weeks, yikes! Good luck!
dresser revamp
I've been looking and looking and looking for the perfect bebe dresser. Something that was fanciful, gorgeous, cheap and in need of a complete makeover. And could fit a changing mat. Well, I couldn't wait any longer, I was literally starting to freak out over it thanks to my obsessive need to nest and organize, so I went where I knew I could find something cheap. It also helps that I found something white, because that meant no painstakingly annoying painting in my future.
So here it was, in all it's boring and blah glory:
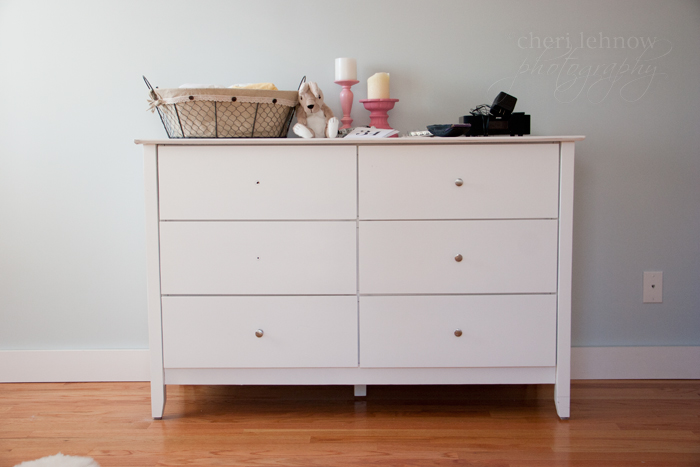
Notice the missing handles, and the knicks and dings? Well, you can't really see those from back here, but trust me, there's a whole corner there that someone jammed into a wall accidentally. Lucky for me, I didn't care and it was only about $115 for the dresser in as-is condition. I could live with that!
And here it is after some minor adjustments:
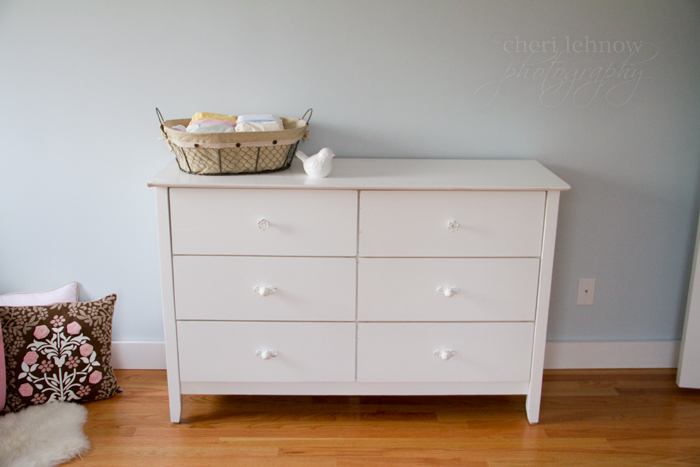
Minor adjustments included taking sandpaper to most of the edges and drawers to blend some preexisting scratches and to give it a more worn, shabby chic look. Next I recruited a good friend who just happens to live next to a Hobby Lobby in the midwest. She did a little hardware shopping for me and I ended up with about 15$ of new handles, which would have cost me a whopping 55-60$ if I had splurged at Anthropologie. The drawer revamp took me about an hour, if you include lining the drawers, if not, it was about 20 minutes. And cost me about $135 dollars. Not bad considering all the dressers in those bebe boutiques will run you around $700+.
Before, with yucky boring knobs:
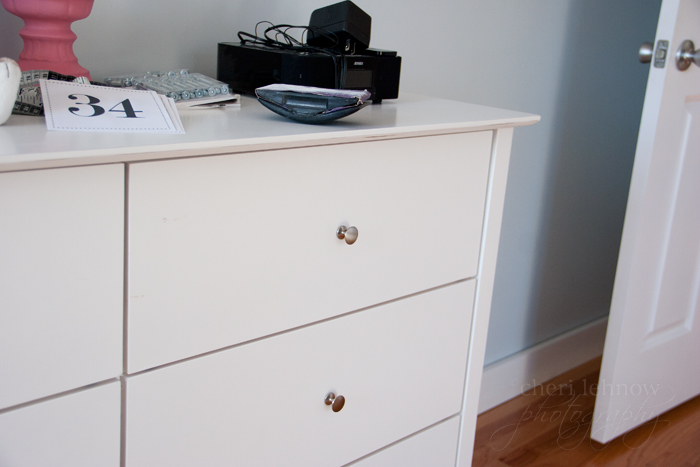
After, with rustic looking white hardware:

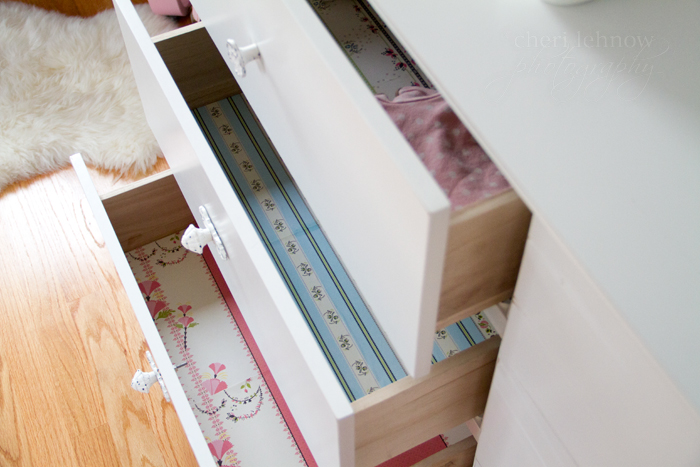
And I even lined the drawers in some adorable paper I had laying around. I know I'll be the only one to see this, but I like the added touch:
I can already foresee a dual naptime for both bebe and Sadie, she seems quite attached to that chair:

So here it was, in all it's boring and blah glory:
Notice the missing handles, and the knicks and dings? Well, you can't really see those from back here, but trust me, there's a whole corner there that someone jammed into a wall accidentally. Lucky for me, I didn't care and it was only about $115 for the dresser in as-is condition. I could live with that!
And here it is after some minor adjustments:
Minor adjustments included taking sandpaper to most of the edges and drawers to blend some preexisting scratches and to give it a more worn, shabby chic look. Next I recruited a good friend who just happens to live next to a Hobby Lobby in the midwest. She did a little hardware shopping for me and I ended up with about 15$ of new handles, which would have cost me a whopping 55-60$ if I had splurged at Anthropologie. The drawer revamp took me about an hour, if you include lining the drawers, if not, it was about 20 minutes. And cost me about $135 dollars. Not bad considering all the dressers in those bebe boutiques will run you around $700+.
Before, with yucky boring knobs:
After, with rustic looking white hardware:
And I even lined the drawers in some adorable paper I had laying around. I know I'll be the only one to see this, but I like the added touch:
I can already foresee a dual naptime for both bebe and Sadie, she seems quite attached to that chair:
Thursday, November 10, 2011
clip on clip off
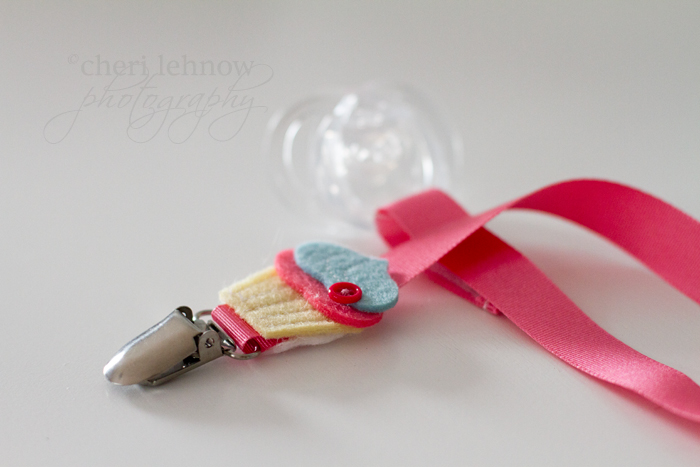
So I became a little obsessed with making these pacifier clips, ever since I saw this tutorial and this one on Pinterest. Dern you Pinterest! As if I didn't have enough to do, you have to torment me with all your brilliant and creative ideas.
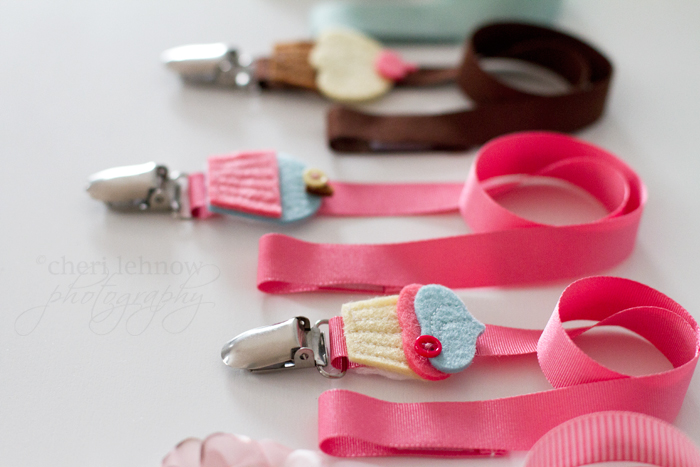
Now making these was SO simple, that I can't possibly ever bring myself to buy one. No matter how cute it is. And that's saying a lot for me. I loosely followed the tutorials, but I used mitten clips from the dollar Target section {4 for $1, holla}, ribbons and some pre-made embellishments {felt stickers anyone?}. I didn't want to put the embellishments directly on the clips however, since I thought about them inconveniently popping off in the future. Instead I opted to put them above the clips, where they will see much less finger time. I attached them with hot glue and sandwiched the ribbon between an embellishment and a felt circle. The flowers were made by me and attached the same way.

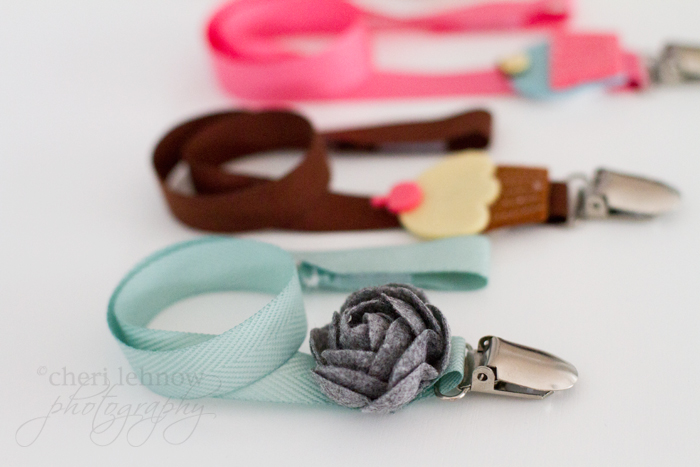
I also tried some without any embellishments:
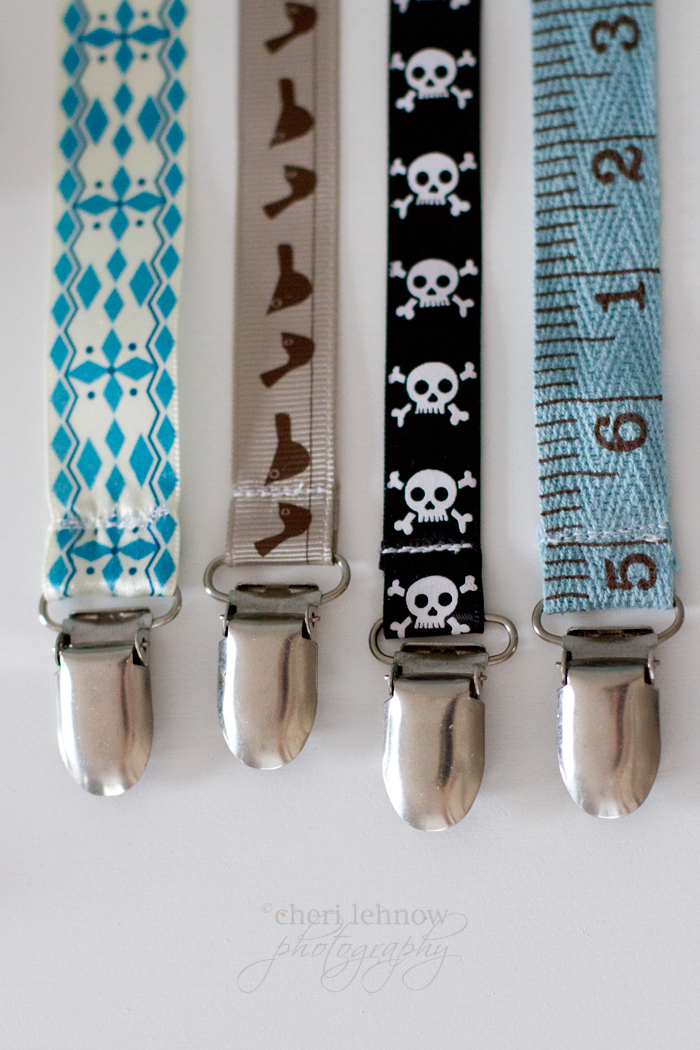
Now I obviously don't need this many clips, so a bunch of these will be put aside for upcoming bebe gifts:
Subscribe to:
Posts (Atom)