Monday, July 29, 2013

Delicious Dishes: Paleo pancakes

Or how one woman survived giving up fluffy cakes of sugary goodness for breakfast.

This is my story, folks, so I might as well write it, yes? Well if I am going to give up wheat and grains then there has to be a good alternative right? Enter almond meal/flour. I haven't bought the flour yet but I hear it's pricey. For now the meal will have to do and at three dollars for 16oz, it's nothing to sneeze at.

Regardless, I tweaked the 'toddler pancake' recipe into something the whole family could enjoy.

Ingredients:
2 ripe bananas
4 eggs
8 tbsp almond meal {I found mine at Trader Joes}
4 tbsp almond milk {I used unsweetened}
1/4 c shredded carrot


This is simple really. Empty all the ingredients into a bowl and combine by mixing with a whisk. Then you just make them like you would any other pancakes, on a hot griddle/frypan. I should add here that you want to think more like silver-dollar pancakes than regular sized cakes since these stay thin making them harder to flip. I used grass-fed butter as a pan greaser but you could also use a little bit of coconut oil. Some Paleo advocates say it's ok to use grass-fed butter in your cooking and baking, which I find won't splatter like hot coconut oil will. I found the butter at Trader Joes as well which is great for budget-friendly shoppers like me...


In conclusion, this is a great alternative to the wheat-based pancakes. We didn't use any syrup and they were still amazing. No sugar, no syrup, and still, everyone loved them. It's hard to give up things you've been used to eating your whole life, but if you look hard enough you may find there are wonderful and tasty alternatives. Enjoy!

Tuesday, July 16, 2013

Can I get an Amen?

For some FREE art? Here's a couple of 8x10 inspiration prints for you on this plain ol' Tuesday.

You can find the large sizes for Spirit of power and love here, and Hope anchors the soul here. Enjoy!


Monday, July 15, 2013

The ocean, she calls to me

Some friends invited us to their beach house for a day this past week. It was marvelous to say the least and the rainy weather held off until our drive home. The overall feeling of the beach community is so relaxed and inviting, by the end of the day we were debating purchasing a house and commuting two hours a day.


At first E was a little upset by all the dirty, gritty sand everywhere. Until she realized it was one giant sandbox. Then she was in love. She played for hours and didn't even bother to take her afternoon nap, although I caught her laying in the sand a couple of times out of sheer exhaustion.


These two finally warmed up to each other and decided to play together in the sand.

But that didn't last long. He was getting a little grabby for her taste.


We thoroughly enjoyed our beach day. We've waited far too long to get to the water this summer so from here on out we'll be back plenty of times to say hello.

Friday, July 12, 2013

I'm hooked: a DIY hanging station

So you know all those beautiful knobs and drawer pulls that are all over the place now? I have a slight addiction. I pick them up all over the place and have a stash ready for when a project pops into my head. Like this one. A sweet little hanging station for behind the door.

This version is simple. All I did was cut a piece of pallet board down to the size I needed, and drilled three holes clear through, large enough for the hardware on my drawer pulls to fit through. The tricky part is drilling a hole large enough to fit the nut on the backside, but only halfway through the board. You want to be able to make your hardware completely flush with the back of the board so it hangs nice and smooth on the wall.

When I had all the pulls/knobs tight on the board, I took a metal saw blade on my Dremel and cut off the backs of the screws that were sticking out past my board. I didn't take pictures along the way, but I'm sure I'll be making more of these, so I'll try to remember to document the steps next time.

So after about 15 minutes, I had myself a custom hanging station for the guest room. Give it a shot, they're extremely easy. And I just hung mine up with a couple of drywall screws that you really can't see unless you're looking too close...


Monday, July 08, 2013

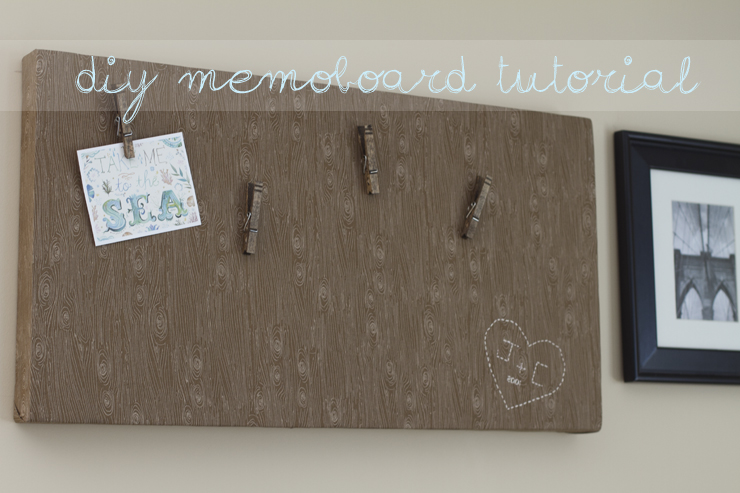
DIY personalized memo board tutorial

The other day I decided I wanted something less formal and more functional above our bed. Artwork that was a little more me. I happened to have a bunch of supplies around so I whipped up a quirky little memo board that I can use as art by itself, or to hang and showcase different prints or photos.

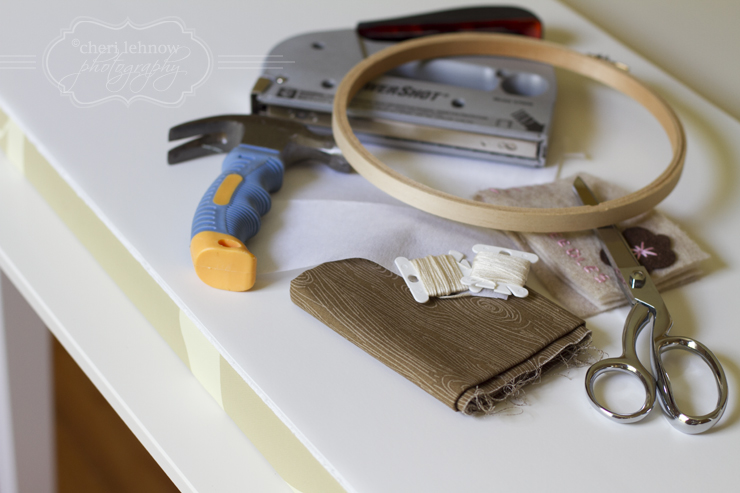
Supplies you'll need:
embroidery hoop
embroidery needle
embroidery floss
staple gun
fabric of your choice
stiff but then fusible interfacing
hammer
scissors
posterboard
canvas {I used a thrift store find, which was just large enough for my space and only cost me a few dollars.}

To get started, just cut your posterboard to the size of your canvas and stick it on with some glue or tape. It doesn't have to be extremely permanent since the fabric will be holding it all together eventually.

Now get started on your embroidery. I cut a paper heart out as a template and then traced it onto my fabric. I then freehanded the letters and numbers. Place your fusible interfacing on the back of the fabric {behind your art} and iron on, then put that whole area inside the embroidery hoop and pull tightly. Once everything is secure, you can start sewing the outlines with your floss/thread. I did a very simple stitch to keep it casual. {And I don't know how to do any fancy stitches anyway!}

 One you're finished with your embroidery, you can start stapling your fabric to the canvas. Start at one end and put a few staples in, one in the middle and one on each edge, then pull tight on the opposite side making sure your fabric is flat and straight, then staple tight on that side. Continue all around your edges until you have a nice taut piece of fabric on the front. Try to fold your corners in neatly and secure with staples.


 At this point, you're basically finished. You can hang that baby, throw some thumbtacks in it and marvel at your awesomeness. For me, I wanted to go a step further. I took some clothespins, added some wood stain and once they were dry I used e6000 glue to adhere some thumbtacks to them. I now have a completely personalized piece of decor for our master bedroom. And I love it. I hope this inspires you to make a custom piece for your room, office or kitchen! Cheers!


Wednesday, July 03, 2013

Rain rain go away, or stay

It's hard to complain about all these thunderstorms when Arizona is so dry it's going up in flames. So although the rain is putting a damper on playing in the sandbox, it is giving us new opportunities to play in the rain. And wear our adorable new raincoat.


Tuesday, July 02, 2013

Craftilicious: Rope jewelry

I took a few minutes this weekend to make these:


This necklace/bracelets set was made for the little one, but I've got a set in the works for myself. They're really simple, quick and incredibly cute. This could even make for a fun rainy-day craft for older kids (5+), boys included. I think everyone would enjoy making these. I found the tutorial here. The bag of rope was only a few dollars at Home Depot and the acrylic paints I used are only 50 cents or so per color. 


Monday, July 01, 2013

George's biggest fan

This kid LOVEs Curious George. And to play with her feet. And not wearing pants. All three at once? Pure bliss.


Related Posts Plugin for WordPress, Blogger...