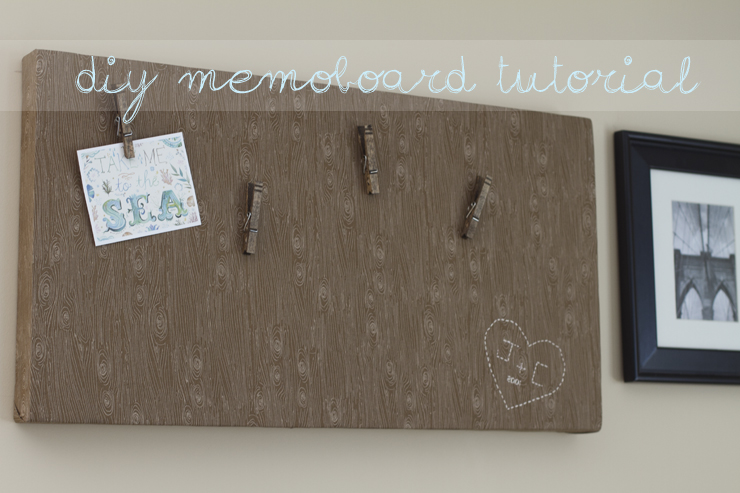
The other day I decided I wanted something less formal and more functional above our bed. Artwork that was a little more me. I happened to have a bunch of supplies around so I whipped up a quirky little memo board that I can use as art by itself, or to hang and showcase different prints or photos.
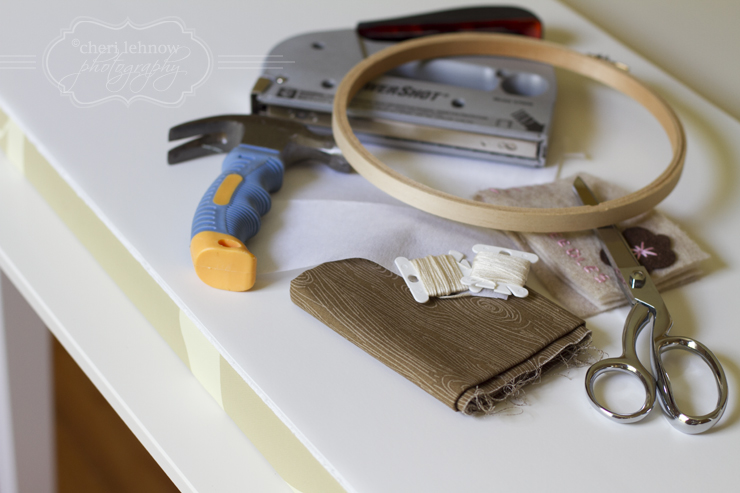
Supplies you'll need:
embroidery hoop
embroidery needle
embroidery floss
staple gun
fabric of your choice
stiff but then fusible interfacing
hammer
scissors
posterboard
canvas {I used a thrift store find, which was just large enough for my space and only cost me a few dollars.}
To get started, just cut your posterboard to the size of your canvas and stick it on with some glue or tape. It doesn't have to be extremely permanent since the fabric will be holding it all together eventually.
Now get started on your embroidery. I cut a paper heart out as a template and then traced it onto my fabric. I then freehanded the letters and numbers. Place your fusible interfacing on the back of the fabric {behind your art} and iron on, then put that whole area inside the embroidery hoop and pull tightly. Once everything is secure, you can start sewing the outlines with your floss/thread. I did a very simple stitch to keep it casual. {And I don't know how to do any fancy stitches anyway!}
One you're finished with your embroidery, you can start stapling your fabric to the canvas. Start at one end and put a few staples in, one in the middle and one on each edge, then pull tight on the opposite side making sure your fabric is flat and straight, then staple tight on that side. Continue all around your edges until you have a nice taut piece of fabric on the front. Try to fold your corners in neatly and secure with staples.
At this point, you're basically finished. You can hang that baby, throw some thumbtacks in it and marvel at your awesomeness. For me, I wanted to go a step further. I took some clothespins, added some wood stain and once they were dry I used e6000 glue to adhere some thumbtacks to them. I now have a completely personalized piece of decor for our master bedroom. And I love it. I hope this inspires you to make a custom piece for your room, office or kitchen! Cheers!


